In this in-depth technical article, Pablo Trujillo explains how to build a custom PetaLinux image for the Red Pitaya STEMlab, focusing on operating system design, board configuration, and software integration rather than FPGA logic alone.
Using Vivado and PetaLinux 2024.2, the guide walks through the complete workflow—from creating a new Zynq-based hardware project and configuring board peripherals, to adapting DDR memory settings for different STEMlab variants and generating a bootable Linux image. The article highlights key considerations when working with Zynq-7000 SoCs, including MIO pin mapping, power bank voltages, and memory configuration differences between STEMlab models.
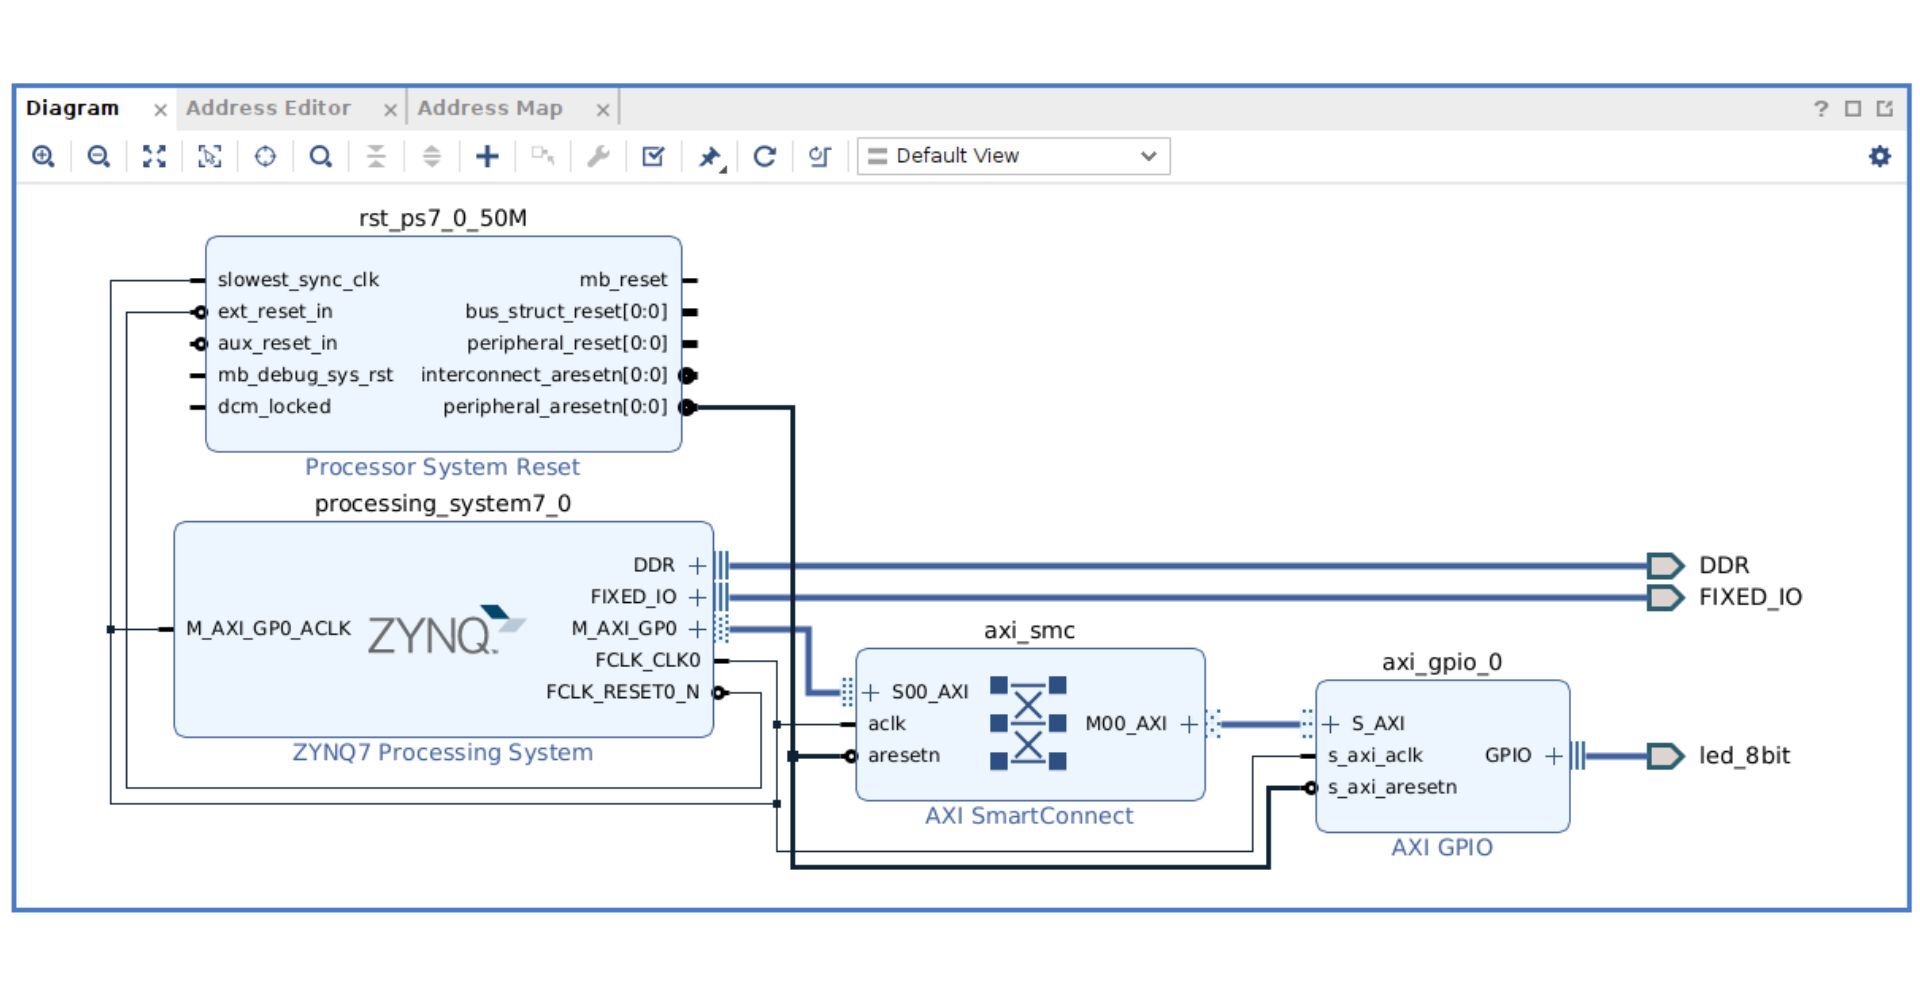
Beyond basic OS bring-up, the article shows how to extend the PetaLinux environment with practical development tools such as Python, NumPy, and Jupyter Notebook, enabling browser-based control and rapid prototyping. A hands-on example demonstrates how to access AXI4 peripherals directly from Python using memory-mapped I/O, bridging FPGA logic and user-space applications.
This tutorial is particularly valuable for embedded Linux developers, FPGA engineers, and industrial R&D teams who want full control over their Red Pitaya platform—whether for custom instrumentation, automation systems, or advanced prototyping workflows.
Read the full article by Pablo Trujillo here.
Frequently Asked Questions (FAQ)
What is the main focus of this article?
The article focuses on creating a custom PetaLinux image for Red Pitaya STEMlab, with an emphasis on operating system configuration, root filesystem customization, and software integration.
Which Red Pitaya models are covered?
The walkthrough uses the STEMlab 125-10, but is directly applicable to other Zynq-7000–based STEMlab boards, including the STEMlab 125-14 and STEMlab 125-14 Gen 2, with changes limited to board-specific configuration such as DDR memory settings.
Which tools and versions are used?
The article uses Vivado 2024.2 and PetaLinux 2024.2, targeting the Xilinx Zynq-7000 architecture.
Why build a custom PetaLinux image instead of using the default OS?
A custom PetaLinux image allows developers to:
-
Enable only required peripherals
-
Add specific Linux packages and Python libraries
-
Integrate FPGA logic more tightly with software
-
Optimize performance and system footprint
What software features are added in this setup?
The custom image includes:
-
Python and NumPy for data processing
-
Jupyter Notebook for browser-based development
-
Low-level AXI register access via memory-mapped I/O
Can this approach be used in industrial applications?
Yes. This workflow is well suited for industrial R&D, embedded systems development, custom test & measurement solutions, and edge computing applications, where full control over the Linux environment is essential.
Do I need deep Linux knowledge to follow the article?
Basic familiarity with Linux command-line tools, FPGA concepts, and embedded systems is recommended, but the article provides clear, step-by-step instructions throughout.
About the Red Pitaya Team
The Red Pitaya Technical Editorial Team is a cross-functional group of technical communicators and product specialists. By synthesizing insights from our hardware developers and global research partners, we provide verified, high-value content that bridges the gap between open-source innovation and industrial-grade precision.
Our mission is to make advanced instrumentation accessible to engineers, researchers, and educators worldwide.